REVIEW · SYDNEY
Jervis Bay Highlights Tour – Small Group Experience Scenic Coast
Book on Viator →Operated by 77Tours · Bookable on Viator
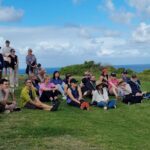
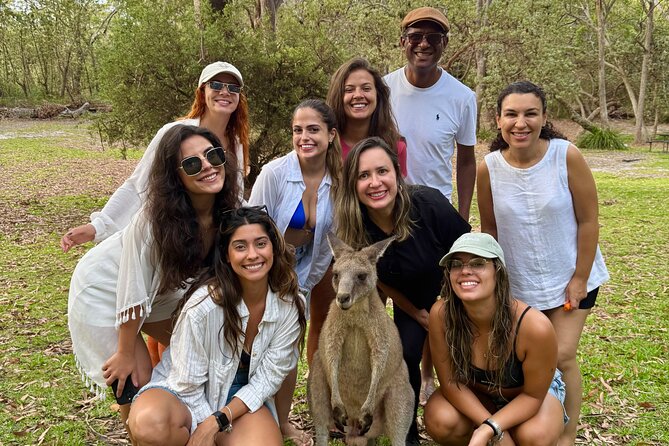
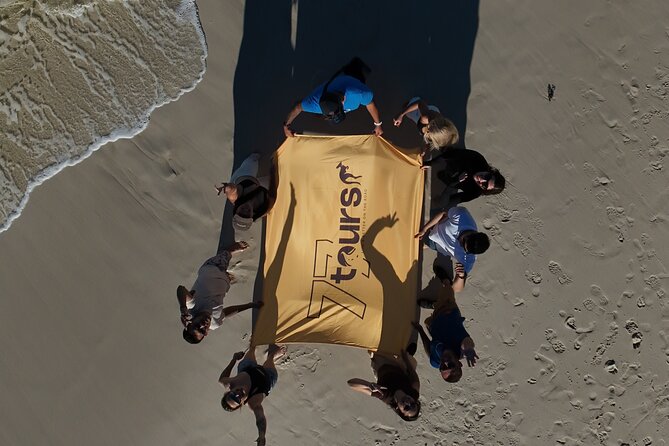
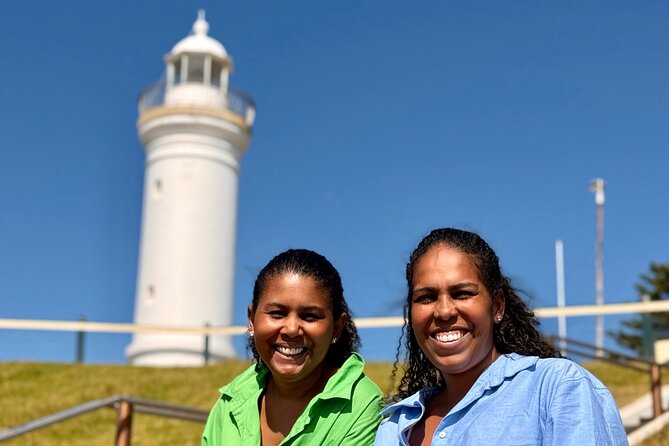
One day, four famous coasts—and kangaroos too. This full-day South Coast tour pairs big viewpoint moments with plenty of time to walk, pause, and take photos, plus a pro photo/video recap. I especially like the small-group feel (max 11), which keeps the day calm instead of chaotic.
I also like that the guide’s focus is on making the photos work, not just shuffling you to stops. With professional photos and videos included, you’re not stuck relying on shaky phone shots after a long drive.
The main catch is simple: it’s a 10–12 hour day with an early 7:00 am start, so plan for a long sitting day in transit.
In This Review
- Key highlights at a glance
- A small-group South Coast day that actually feels like a day
- Central Station pickup and how the day runs (7:00 am to evening)
- Sea Cliff Bridge secret viewpoint: a 10–15 minute walk for huge payoff
- Bald Hill Lookout and hang-gliding spot: ocean views plus wildlife odds
- Kiama Blowhole: watch the waves do the work
- Gerringong lunch break: plan for your own spend
- Hyams Beach and the white-sand walk: where the coast turns playful
- Kangaroos and Cave Beach in Booderee National Park: calm wildlife time
- Professional photos and videos: why this tour feels like a deal
- Price ($175.72) and what you’re really buying for the day
- Who this tour suits best (and who should think twice)
- Should you book the Jervis Bay Highlights Tour from Sydney?
- FAQ
- How long is the Jervis Bay Highlights Tour?
- What time does the tour start and where do I meet?
- What’s the maximum group size?
- Is lunch included?
- Does the tour include professional photos and videos?
- What if the weather is bad?
- What’s the cancellation window for a full refund?
Key highlights at a glance
- Max 11 people means less waiting and more time at viewpoints
- Pro photo and video pack helps you relive the day later
- Sea Cliff Bridge secret viewpoint is a quick walk for dramatic results
- Whales or dolphins are possible from Bald Hill Lookout
- Hyams Beach white-sand time with an optional scenic walk
- Cave Beach at Booderee National Park adds a peaceful finish and wildlife odds
A small-group South Coast day that actually feels like a day
This tour is built around short, scenic breaks that add up to a full-on coastal experience without feeling like a sprint. You’ll go from Sydney down the coast, with stops chosen for views, photos, and that laid-back beach timing Australia is famous for.
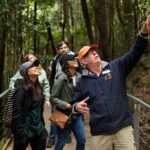
What makes it work is the way the day is paced. You’re given real time at key photo spots, not just a quick “look and go.” And because the group is capped at 11 travelers, the guide can pay attention to what you need—especially if you want a particular angle, or you’re trying to keep your day smooth.
My other favorite part: you’re not locked into one type of scene. You get cliffs, ocean lookouts, a famous natural spectacle, then bright beach time, and finally a national-park finish. It’s a good mix for first-timers and return visitors who want variety without planning it themselves.
You can also read our reviews of more tours and experiences in Sydney.

Central Station pickup and how the day runs (7:00 am to evening)

You start at Central Station Kiss and Ride Bay (Railway Colonnade Dr, Haymarket). The start time is 7:00 am, so this is the kind of day where your clothes and shoes matter—because after a long morning start, you’ll still be walking and photographing midday.
The tour includes a mobile ticket, and the day is designed to get you on the road early and back in time for an evening finish at the same meeting point. Expect a lot of “drive, stop, explore, repeat,” with each stop timed so you’re not stuck waiting too long.
One practical note: because this is a good-weather-required outing, you should watch the forecast for your travel dates. If the weather doesn’t cooperate, the operator will offer a different date or a full refund. That’s helpful because coastal areas can look dramatically different when clouds roll in or winds pick up.
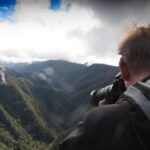
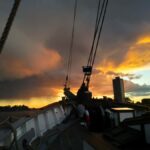
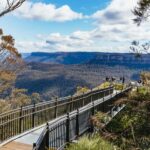
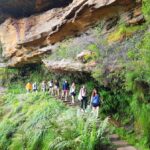
Sea Cliff Bridge secret viewpoint: a 10–15 minute walk for huge payoff
The day begins with one of those places you’d be unlikely to find on your own: a short 10–15 minute walk to a secret viewpoint above the Sea Cliff Bridge. The idea here is simple. You get above the main scene, so you can capture the dramatic coastal setting from a higher angle.
This stop is worth it even if you’re not a hardcore photographer. You’ll see why the area is famous: rugged coastlines, cliff edges, and a sense of scale that’s hard to grasp from the roadside alone.
Bring comfortable shoes because that quick walk still counts—especially if you’re wearing anything too slick. If you’re planning to shoot from multiple angles, this is the kind of stop where the guide’s help can really matter. You’ll also want to keep your camera ready; the ocean views don’t wait around for perfect timing.
Bald Hill Lookout and hang-gliding spot: ocean views plus wildlife odds
Next up is Bald Hill Lookout, a classic coastal viewpoint with a hang-gliding spot. The big draw is the ocean panorama—wide, open, and made for photos that look like postcards.
This is also one of the stops where the tour’s “nature timing” can work in your favor. You may spot whales or dolphins, depending on conditions. Even when you don’t see wildlife, the views are still the main event, and you’ll have enough time to enjoy them without feeling rushed.
If you’re sensitive to wind (or you’re wearing light layers), pack something for the lookout. Coastal breezes can change fast, and you’ll likely want to linger for photos.
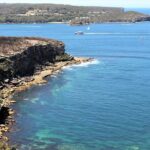
Kiama Blowhole: watch the waves do the work
At Kiama Blowhole, you’re heading to one of the most dramatic natural attractions in the region: a blowhole where powerful waves shoot water high into the air. This is the kind of stop that looks better in person than in photos because the action is always changing.
You’ll spend about 50 minutes here, which is important. Blowhole timing can be unpredictable—waiting a bit is part of the experience. With that amount of time, you’re not stuck under the same conditions the whole stop.
This is also a good place to practice patience with your camera. Instead of trying to freeze every moment, you’ll probably catch the bigger shots as the water builds and releases.
- Blue Mountains Small-Group Tour from Sydney with Scenic World,Sydney Zoo & Ferry
★ 5.0 · 3,709 reviews


Gerringong lunch break: plan for your own spend
You’ll stop in Gerringong for lunch with an ocean view, and this is your own expense. That matters for budgeting: you’ll want to bring money or a card plan that works for local dining.
I like this lunch setup because it’s a break in the middle of the day, not a rushed grab-and-go. You can choose something that fits your appetite and energy level before continuing to beach time.
The guide also helps with practical choices. In the feedback I’ve seen, people appreciated restaurant recommendations, which is a big deal when you’re on a tight schedule and don’t know the area.
If you want to make the lunch work smoothly, eat earlier rather than later. It gives you a cleaner runway for the next stops and reduces stress when you’re thinking about photos and walking.
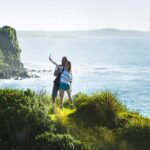
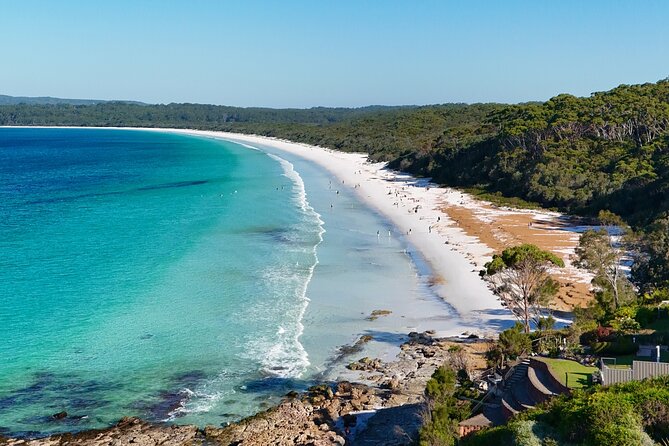
Hyams Beach and the white-sand walk: where the coast turns playful
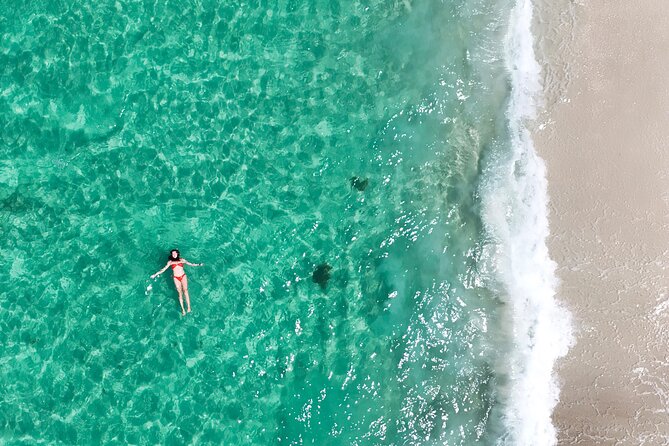
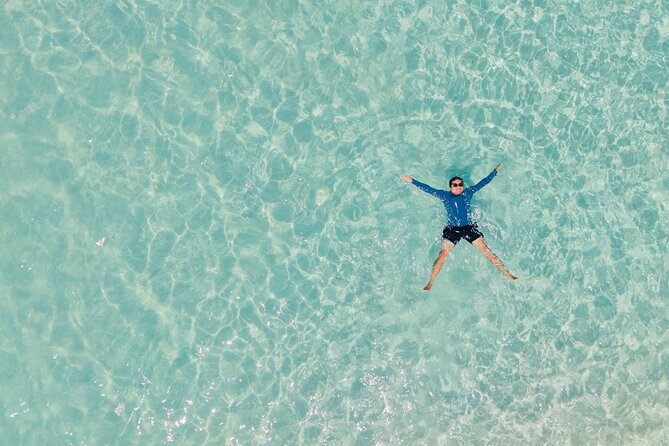
Then comes Hyams Beach, known for having some of the whitest sand in the world and bright turquoise water. This is your “slow down and breathe” stop.
You’ll have about 50 minutes, and that’s usually enough time to do one of these:
- relax and enjoy the beach vibe
- take photos with the sand and water contrast
- walk along the White Sands Walk if you want movement and scenery
Even if you don’t swim, this stop is still valuable. The color and texture of the sand show up beautifully in photos, and it’s one of those places where your brain finally understands why everyone raves about the South Coast.
Wear sunscreen and consider a hat. Coastal glare can be intense, and you’ll likely be out in open light during this segment. Also, bring a small towel or something you can wipe off with—white sand plus salty water can make a mess on light clothing.
Kangaroos and Cave Beach in Booderee National Park: calm wildlife time
Later in the day, you’ll get wildlife viewing opportunities, including an open area where kangaroos live freely, plus a finish at Cave Beach in Booderee National Park. The chance to see wild kangaroos is part of what makes the day feel uniquely Australian—quiet, natural, and less manufactured than big-city attractions.
At Cave Beach, the vibe shifts again. Instead of the big-view photo energy of the earlier stops, this is a peaceful coastal end to the day. It’s a nice way to close the loop: you’ve been driving and photographing all day, and then you land in a calmer setting with the ocean and nature doing their thing.
Wildlife spotting can’t be forced, of course. You’ll get the best odds by staying alert and following the guide’s lead on where to stand and when to move your camera. And if you see kangaroos, keep distance. Respect is the simplest way to keep everyone safe and comfortable.
Professional photos and videos: why this tour feels like a deal
Here’s the part I’d pay attention to if you hate missing your best shots. This tour includes professional photos and videos to remember your journey. In a day like this—cliffs, ocean action, fast-changing light—that kind of recap can be worth a lot.
You’re also not just relying on your own timing. The guide helps position people for photos at the right stops, which is a big reason people mention feeling cared for during the day. From the feedback I’ve seen, the support is practical: help with photo moments, caring attitudes during walking breaks, and even help with bathroom needs when you’re on the move.
If you want to maximize the photo outcome, keep your timing simple:
- be ready at the start of each photo moment
- wear something you’re comfortable moving in
- bring your camera settings or phone charged, but don’t obsess over it
Think of this as you doing the sightseeing, and someone else doing the heavy lifting for the final visual product.
Price ($175.72) and what you’re really buying for the day
At $175.72 per person, this isn’t a “cheap and cheerful” option—but it also isn’t priced like a private driver + you doing all the planning yourself. You’re paying for a full-day route from Sydney, guided stops, time at several major coastal hits, small-group attention, and the professional photo/video package.
For me, the value makes sense because:
- you’re getting multiple signature locations in one day
- the group size is limited (so the guide can manage people and timing)
- the photo and video deliverable reduces the cost of paying for separate guided photo help
- the itinerary is built around photo-friendly timing and walkable viewpoints
If you’re coming from Sydney and want the highlights of the coast without figuring out parking, routes, and stop sequencing, this price starts to look reasonable fast.
The one budgeting caution: lunch in Gerringong is not included, so plan that extra spend.
Who this tour suits best (and who should think twice)
This tour is a strong match if you like scenic driving with real stops, want a low-effort way to see a lot, and appreciate being guided to photo-friendly viewpoints.
It’s also a good fit for families and mixed-age groups because the pace is meant to feel safe and manageable. In the feedback I’ve seen, people appreciated how caring the guide was with comfort needs, including help during walks and bathroom breaks.
Where it might not be for you: if you’re not into early starts or you don’t enjoy sitting in a vehicle for long stretches. This is a full-day commitment. You’ll be on the move for most of the day, even with time to explore at each stop.
Should you book the Jervis Bay Highlights Tour from Sydney?
I’d book it if you want a tight, scenic South Coast day with minimal planning and a photo/video recap that saves you from spending the trip only chasing your own camera shots.
You should also consider it if you like small groups and value a guide who helps you feel comfortable—especially around photo moments and practical needs during the day. The guide’s approach is a big part of why people rate this tour so highly.
Skip it if an early 7:00 am start will ruin your trip rhythm, or if you’re on a strict lunch budget. Otherwise, this is a very solid way to connect Sea Cliff Bridge, Kiama, Hyams Beach, and Booderee’s coast into one memorable day.
FAQ
How long is the Jervis Bay Highlights Tour?
It runs about 10 to 12 hours.
What time does the tour start and where do I meet?
Pickup starts at 7:00 am at Central Station Kiss and Ride Bay (Railway Colonnade Dr, Haymarket NSW 2000).
What’s the maximum group size?
The tour has a maximum of 11 travelers.
Is lunch included?
Lunch time is in Gerringong, but lunch is not included (own expense).
Does the tour include professional photos and videos?
Yes. You receive professional photos and videos to help you remember your journey.
What if the weather is bad?
The tour requires good weather. If it’s canceled due to poor weather, you’ll be offered a different date or a full refund.
What’s the cancellation window for a full refund?
You can cancel up to 24 hours in advance for a full refund.
You Might Also Enjoy

![PJ Blue Mountains Supreme [Private Charter] - Echo Point Lookout and the Three Sisters: The View Plus the Story](https://5.voilasydney.com/wp-content/uploads/pj-blue-mountains-supreme-private-charter-400x267.jpg)

More Tours in Sydney
- Blue Mountains Small-Group Tour from Sydney with Scenic World,Sydney Zoo & Ferry
★ 5.0 · 3,709 reviews

More Tour Reviews in Sydney
- Blue Mountains Small-Group Tour from Sydney with Scenic World,Sydney Zoo & Ferry
★ 5.0 · 3,709 reviews