REVIEW · SYDNEY
Jervis Bay, Kiama & Kangaroo Valley Day Trip From Sydney-PVT
Book on Viator →Operated by King of Tours · Bookable on Viator
Coastal wow, country calm, all in one day. This Jervis Bay, Kiama & Kangaroo Valley day trip strings together Kiama Blowhole and Jervis Bay scenery with a private-group pace and easy pickup. I like that you’re in a private setup with pickup instead of shuffling to a departure point. I also like that the operator has shown flexibility to adjust the plan when a request comes up. The main drawback to consider: some headline sights may require their own admission, and the Blowhole effect depends on the ocean conditions.
You’re signing up for a full South Coast day, not a slow weekend. Expect long stretches of driving, then a sequence of lookouts and photo stops that keep the day moving. The vehicle has WiFi, plus bottled water and coffee/tea, which helps when the hours add up.
If you want beaches and coast icons and a calm inland valley, this route makes sense. Just go in with realistic expectations: it’s built around short windows at each stop, so you’ll want to decide what you care about most before you start.
In This Review
- Quick hits for planning
- Why this Jervis Bay, Kiama & Kangaroo Valley day trip works
- Price and what you actually get for $357.90
- The 11-hour schedule: how to handle a long South Coast day
- Kiama Blowhole: catching the spray at up to 30 meters
- Huskisson in Jervis Bay: beaches, marine life, and a marina lunch break
- Kangaroo Valley and Hampden Bridge: country calm without overbuilding the day
- Grand Pacific Drive and Sea Cliff Bridge: turning the return drive into a highlight
- Bald Hill Lookout and the hang gliding spot: short stop, wide view
- Private-tour perks: pickup, comfort, and schedule flexibility
- The one thing to double-check before you go
- Who this day trip from Sydney is best for
- Should you book this private Jervis Bay, Kiama & Kangaroo Valley day trip?
- FAQ
- How long is the day trip from Sydney?
- Is pickup included?
- Is this a private tour?
- What are the main stops on the route?
- Are admission tickets included for the stops?
- What’s included in the price?
- Can I cancel for free, and when should I book?
Quick hits for planning
- Private-group setup means it’s just your group, with pickup offered from your Sydney area starting point.
- Kiama Blowhole can shoot water up to 30 meters when conditions are right, but it’s not guaranteed every minute.
- Jervis Bay timing is built around a visit to Huskisson for a quick lunch at the marina.
- Kangaroo Valley + Hampden Bridge adds a slower, greener contrast to the coast.
- Grand Pacific Drive and Sea Cliff Bridge turn the return drive into part of the experience, not dead time.
- Bald Hill Lookout gives you a broad view over the Illawarra region in a short stop.
Why this Jervis Bay, Kiama & Kangaroo Valley day trip works
This tour is basically a three-act road trip: coast first, then inland country, then coast again on the way back. That structure matters because it keeps the scenery from repeating too much. After you’ve had your ocean hit at Kiama and Jervis Bay, the Kangaroo Valley stop is a relief—rolling hills, greenery, and a small-village feel that slows your pulse.
You also get a guide and a private ride, which changes the rhythm. Instead of spending energy figuring out transport between scattered attractions, you’re moving as a group in an air-conditioned vehicle. Even if you’re the type who likes to wander, the route gives you enough structure to see the big icons without eating your whole day in logistics.
One more subtle win: WiFi on board helps when you want to double-check tide/weather timing for the next stop or map out where you want to walk for lunch. Small stuff, but it adds up on a day that’s about 11 hours long.
You can also read our reviews of more tours and experiences in Sydney

Price and what you actually get for $357.90
At $357.90 per person, you’re paying for three things at once: private transportation, a guide-led schedule, and included comfort items. That price also reflects that you’re doing multiple major stops in one day without multiple rentals or rideshare splintering the experience.
What’s included is practical:
- bottled water
- coffee and/or tea
- an air-conditioned vehicle
- private transportation
- WiFi on board
What’s not included is where most people feel the sticker shock later: several stops list admission as not included. For example, Kiama Blowhole and Sea Cliff Bridge are marked as admission not included. Jervis Bay (including the Huskisson lunch time) and Kangaroo Valley stops are marked free for admission.
So the value equation is simple:
- If you mainly want the big sights and you’re okay paying for a couple of them directly, the all-in logistics convenience can be worth it.
- If you’re trying to minimize extra spending once you’re there, you’ll want to budget for those likely add-ons.
Also, it’s booked about 96 days in advance on average. That often means popular days fill up, and you’ll feel more comfortable locking in early—especially if your group has any firm preferences.
The 11-hour schedule: how to handle a long South Coast day
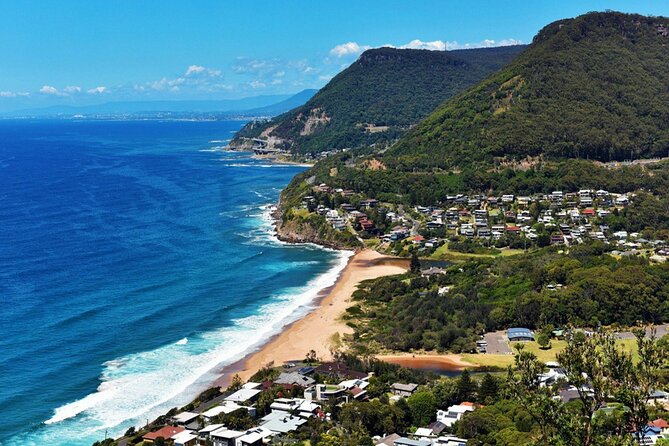
An 11-hour day can feel like a lot, and it is. The tour plan accounts for travel time—about 5 hours and 15 minutes—because the distances from Sydney add up fast. The practical takeaway: you’re not just traveling between places; you’re also doing real sightseeing time in limited chunks.
Here’s how to make it work without feeling rushed:
- Pick your “must-see” before you go. Kiama Blowhole is usually the main weather-dependent moment. Sea Cliff Bridge is the main scenic stop on the way back.
- Dress for a full-day outing, not a two-hour visit. Even with included water and coffee/tea, you’ll still want sunscreen and a light layer for the drive.
- Use the short stops wisely. When the plan says 45 minutes at Bald Hill Lookout, treat that as one focused viewing moment, not “casual browsing time.”
The private setup helps because your guide can steer your group so you’re not constantly lost or waiting on people at a public tour hub. That said, short stop times still mean you should come ready with a quick game plan: where you want to stand, where you want to walk, and what you want photographed first.
Kiama Blowhole: catching the spray at up to 30 meters
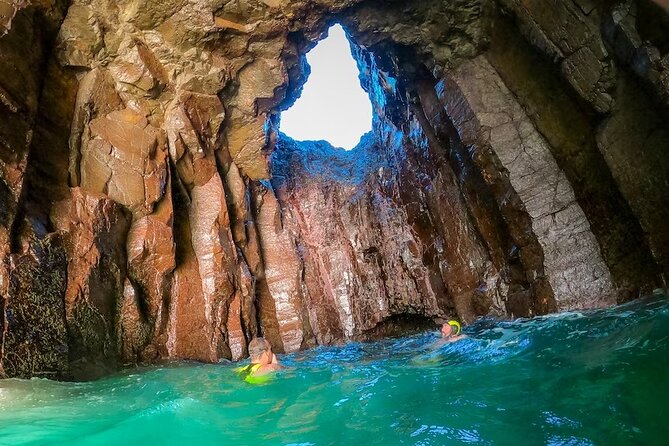
Kiama Blowhole is the kind of place that sounds simple and turns dramatic fast. Under the right ocean conditions, the water spray can reach up to 30 meters. That “up to” wording is key. The Blowhole isn’t a machine you can control; it’s a natural phenomenon tied to waves and timing.
What I like about making this the first real stop is that you’re not already tired from later driving when you arrive. The tour starts with an hour at Kiama Blowhole, which gives you enough time to:
- see the spray when it happens
- take photos and adjust your position
- step away if conditions are quiet for a stretch
One practical note: because admission isn’t included, confirm you’re mentally ready for that extra payment. Also, if you’re the type who hates uncertainty, this is the one stop where you’ll feel it most. If you get good conditions, it’s memorable. If not, your best move is to treat it like a nature show with a short waiting period—not a guaranteed blast.
Huskisson in Jervis Bay: beaches, marine life, and a marina lunch break
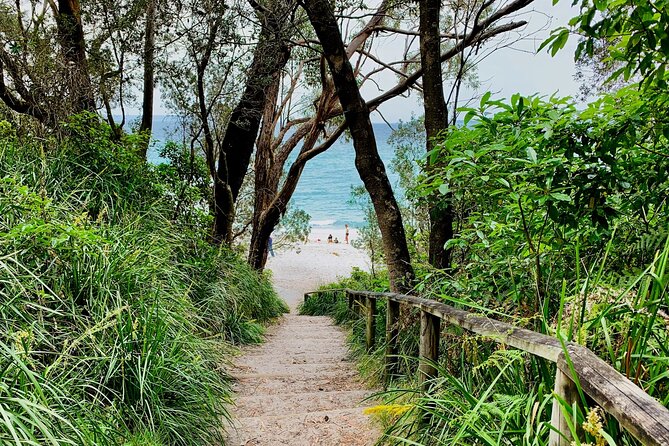
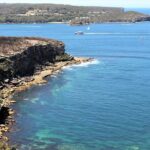
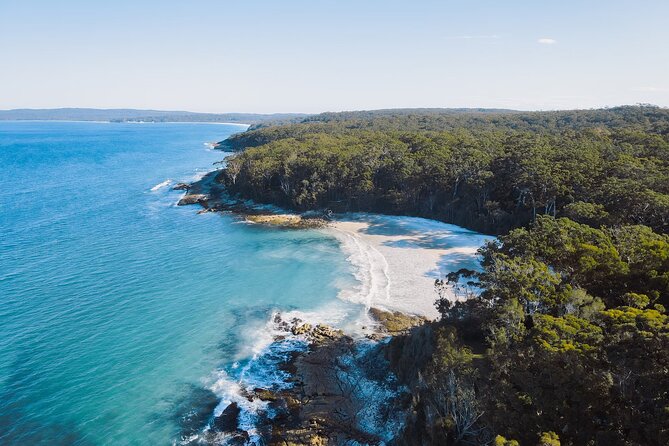
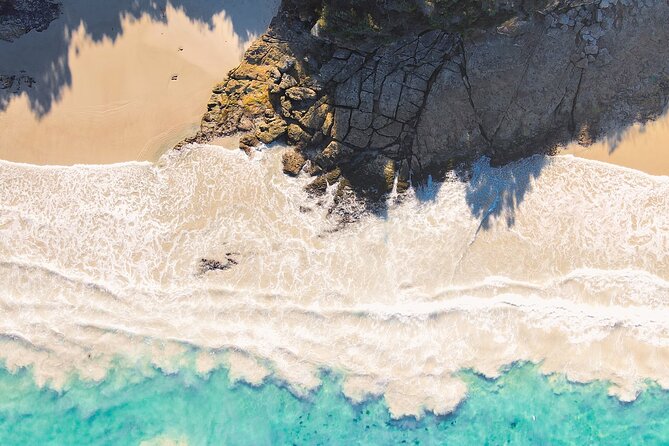
Jervis Bay is famous for its white sandy beaches and marine life, and the tour gives you about two hours here. You’ll stop at Huskisson, where the plan includes quick lunch at the marina.
This is a good setup for a day trip because lunch isn’t an afterthought. You’re not hunting for food with half your group hungry and stressed while you still have two more major stops ahead. The marina lunch break also keeps everyone close to where you need to be next, so you lose less time to transit.
A helpful mindset at Jervis Bay: use the time to soak in the coastal atmosphere rather than trying to “do everything.” With only two hours, you’ll get the most satisfaction if you focus on:
- a short walk or viewpoint time to enjoy the beach-and-water look
- a relaxed lunch with minimal backtracking
Admission here is marked free, so you’re less likely to feel hit by extra costs during this middle part of the day. If you’re traveling with kids, this is often the sweet spot: beach views are immediate, and the marina lunch break gives a normal, familiar rhythm.
- Blue Mountains Small-Group Tour from Sydney with Scenic World,Sydney Zoo & Ferry
★ 5.0 · 3,709 reviews


Kangaroo Valley and Hampden Bridge: country calm without overbuilding the day
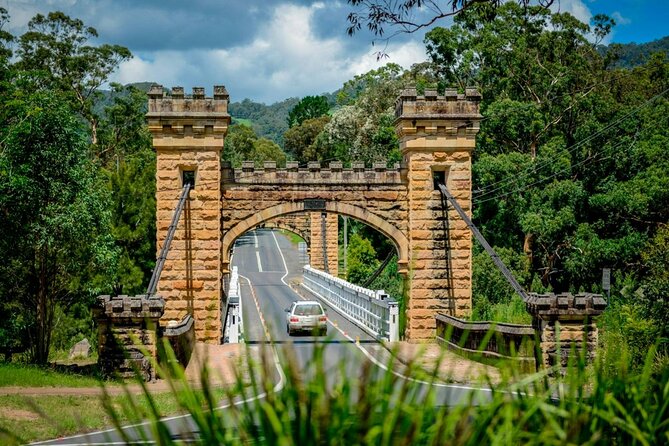
After the coast, Kangaroo Valley shifts the mood. The valley is known for lush greenery, rolling hills, and a charming village atmosphere. It’s a welcome contrast if you’ve spent the morning thinking about water, waves, and spray.
You’ll have about an hour, which includes a stop at Hampden Bridge. That bridge is described as historic, so it’s not just a random photo point. For many people, it’s one of those “pause and look” moments where the scenery does the talking.
What to expect in this part of the day:
- enough time to take in the valley views
- a simple sightseeing moment at Hampden Bridge
- a sense of a quieter pace before you head back toward Sydney
Because admission is marked free at this stop, this section is also one of the lowest-friction parts financially. It’s also a nice reminder that the South Coast isn’t only beaches—there’s country scenery worth seeing.
Grand Pacific Drive and Sea Cliff Bridge: turning the return drive into a highlight
The return route is not just transportation. You’ll drive along Grand Pacific Drive and cross Sea Cliff Bridge, with about an hour set aside for this segment.
Sea Cliff Bridge is described as iconic and extends over the coast. Even without a long stop, it’s the kind of crossing where you can appreciate the scale and the ocean views from the vehicle and any nearby viewpoints your guide offers.
Just remember: admission isn’t included here, so plan for that possible add-on. The upside is that you’re not paying extra for the ride quality. The comfort items—air-conditioning, bottled water, and coffee/tea—are already part of the day, which helps when you’re working through the late-afternoon travel stretch.
If you’re someone who loves road views more than museum-style stops, this is the payoff section. It turns the “we’re going back” feeling into “we still get to see something.”
Bald Hill Lookout and the hang gliding spot: short stop, wide view
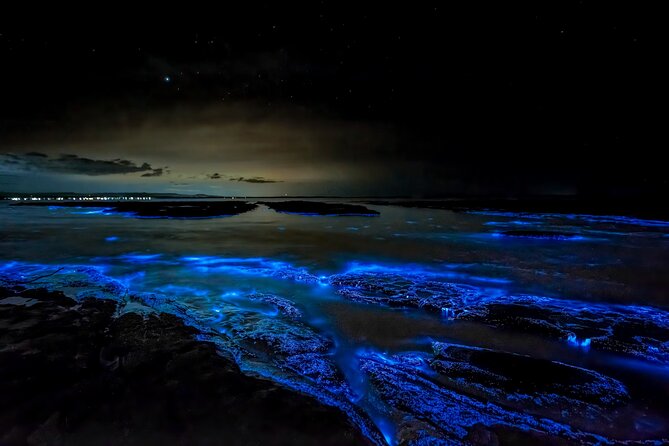
The final scenery moment is Bald Hill Lookout, with a quick 45-minute stop. You’ll get sweeping views over the Illawarra region, and the area is also noted as a hang gliding spot—so you’re in a high, open viewing area rather than a tight urban viewpoint.
This stop is short by design, and that’s a plus. By the time you arrive, you’re likely a little tired from the day. A concise stop gives you a clean, final chance to:
- take photos with a wide horizon
- enjoy the cooler feeling that sometimes comes from elevation and open air
- reset before the drive back to Sydney
Because admission isn’t included, you won’t have to think about extra tickets at the very end. For practical packing: if you’ve been waiting to get a decent panorama shot, aim to use this stop for that.
Private-tour perks: pickup, comfort, and schedule flexibility
This is a private tour, meaning only your group participates. That matters more than people expect. In a standard group tour, you spend time coordinating everyone. Here, your time stays more predictable.
Two perks are especially meaningful on a long day:
- Pickup offered: you’re not necessarily dealing with a shared meeting point experience.
- flexibility in real-world moments: I’ve seen this operator willing to adjust the itinerary if your group asks for a different direction during the day.
One example from a prior experience includes a reroute to visit Featherdale Wildlife Park when the original day didn’t meet expectations. That doesn’t mean every request will be possible, but it does signal that the guide and operator are listening rather than sticking rigidly to a script.
Comfort also stays consistent. The air-conditioned vehicle is a big deal when you’re driving for hours. Bottled water and coffee/tea mean fewer moments where you’re scrambling for basic comforts between stops. And WiFi on board can help with quick planning or just passing the time.
The one thing to double-check before you go
There’s a mismatch risk with any day trip that strings together several high-profile sights. In at least one case, the experience felt different from what was expected based on how it was presented. The most useful lesson: before you commit, confirm what’s included and what isn’t for the stops that matter most to you.
In practical terms, I’d do this:
- Ask about admission at Kiama Blowhole and Sea Cliff Bridge, since those are specifically marked as not included.
- If you care about a particular viewing angle or timing-sensitive moment, make sure you know how long the stop really is and what your guide will prioritize.
- If your group has a specific request, bring it up early in the day so it can be considered with the rest of the schedule.
That small amount of homework helps you avoid the most frustrating kind of disappointment: paying for a day trip and then feeling like the day ran in a different direction than you thought.
Who this day trip from Sydney is best for
This tour fits best if you want a single-day hit of multiple South Coast regions without the hassle of self-driving between them.
It’s a great match for:
- nature lovers who also want coastal icons
- families who prefer a structured plan and comfort on the road
- people who like road-trip viewpoints, not long hikes
- groups who benefit from private transportation and a guide’s coordination
It’s less ideal if you:
- want a totally unhurried day with lots of free time at each stop
- are allergic to paying extra for admission at key sights
- need guaranteed conditions for the Blowhole to be impressive
If you’re flexible and you’re okay with short stop windows, you’ll likely enjoy how much variety you pack into one day.
Should you book this private Jervis Bay, Kiama & Kangaroo Valley day trip?
I’d consider booking if you want an easy, private way to see Kiama, Jervis Bay, and Kangaroo Valley all in one go, with comfort taken care of (air-conditioning, water, coffee/tea, WiFi) and pickup that reduces the hassle.
I’d pause if your budget can’t stretch for admission at multiple stops, or if you’re highly sensitive to natural timing effects—because the Blowhole spray is condition-based, not scheduled-on-demand.
My practical rule: if you’re going for the big-name highlights and you confirm which admissions you’ll likely pay at Kiama Blowhole and Sea Cliff Bridge, this can be a very satisfying one-day route.
FAQ
How long is the day trip from Sydney?
The tour runs for about 11 hours.
Is pickup included?
Pickup is offered, and the experience includes private transportation.
Is this a private tour?
Yes. It’s private, and only your group will participate.
What are the main stops on the route?
The route includes Kiama Blowhole, Jervis Bay (with a lunch stop in Huskisson), Kangaroo Valley (including Hampden Bridge), Grand Pacific Drive and Sea Cliff Bridge, and Bald Hill Lookout.
Are admission tickets included for the stops?
Not all admission is included. Kiama Blowhole and Sea Cliff Bridge are listed as not included, while Jervis Bay and Kangaroo Valley stops are listed as admission free.
What’s included in the price?
The price includes bottled water, coffee and/or tea, an air-conditioned vehicle, private transportation, and WiFi on board.
Can I cancel for free, and when should I book?
You can cancel for a full refund up to 24 hours before the experience starts. On average, this tour is booked about 96 days in advance.
You Might Also Enjoy


More 1-Day Tours in Sydney

More Tour Reviews in Sydney
- Blue Mountains Small-Group Tour from Sydney with Scenic World,Sydney Zoo & Ferry
★ 5.0 · 3,709 reviews