REVIEW · SYDNEY
Sea Cliff Bridge, Kiama Blowhole, Beaches & Wildlife Small Group
Book on Viator →Operated by Picture Me Sydney · Bookable on Viator
Sea air, cliffs, and wildlife in one day. This full-day Kiama Coast tour pairs iconic stops like Sea Cliff Bridge and Kiama Blowhole with a local-driver setup that keeps the day moving. I love the small group vibe (you actually get time to ask questions and swap photos). I also love that the route balances coast drama with beach-and-bush time. One drawback: it’s a long 10-hour day with moderate walking, so plan your shoes and energy.
You start from central Sydney with round-trip transport, then head south through bushland, forests, farmland, and viewpoints. The big payoff is how quickly you go from city pace to coastal scenery, with multiple stops built around lookout views and short coastal walks.
In This Review
- Key things I’d circle before you book
- Why the Illawarra Coast feels like a win from Sydney
- Small-group comfort and a guide who works the photos
- Stop-by-stop: from Bald Hill’s hang-gliding views to Sea Cliff Bridge
- Bald Hill Lookout & hang-gliding spot
- Sea Cliff Bridge (Wollongong) and the Grand Pacific Drive
- Shellharbour beach time: walking without the rush
- Minnamurra coastal walk: basalt cliffs and real walking time
- Kiama Blowhole: volcanic headland theater
- Saddleback Mountain Lookout: the 280-degree view factor
- Jamberoo: quick countryside flavor before you head back
- Lunch, snacks, and what’s included for real value
- Walking level: what moderate really means on this coast
- Best photo strategy for Sea Cliff Bridge, Blowhole, and Saddleback
- Price and logistics: what you’re really buying for $202.26
- Who should book this Kiama Coast day trip
- Should you book this tour?
- FAQ
- How much does the Sea Cliff Bridge, Kiama Blowhole, Beaches & Wildlife tour cost?
- How long is the tour?
- What is the group size?
- What’s included in the tour price?
- Is lunch vegetarian-friendly?
- How much walking is involved and what should I wear?
- What are the age requirements?
- Where is the meeting point in Sydney?
- What happens if the weather is bad or I need to cancel?
Key things I’d circle before you book
- Max 11 people means fewer crowds and more guide attention at each stop
- Sea Cliff Bridge + Kiama Blowhole deliver headline coastal scenery without extra ticket fuss
- Minnamurra coastal walk (50 minutes) is the best walking stretch on the day
- Lunch, snacks, bottled water are included, with a vegetarian option on request
- Local driver/photographer focus helps you get great shots, even if you’re traveling solo
- Planned for good weather so viewpoints and ocean views look the way they should
Why the Illawarra Coast feels like a win from Sydney
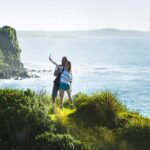
This is one of those day trips that works because it changes your scenery fast. Within a couple of hours, you’re trading skyline views for ocean air, rocky headlands, and cliffs. The Illawarra region has that “South Coast” feel Australia does so well: dramatic rock, clean beaches, and countryside drifting into view.
The pacing is also thoughtful. Short stops keep it from turning into a bus-sit-all-day situation, but you still get enough time at each highlight to walk a little, take photos, and enjoy the moment rather than just passing through.
And there’s a practical bonus: the tour is built around getting you to viewpoint spots and beaches without you needing to rent a car or figure out parking.
You can also read our reviews of more tours and experiences in Sydney


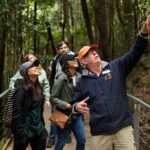
Small-group comfort and a guide who works the photos
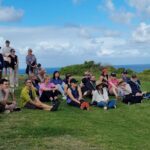
The tour runs with a small group capped at 11 travelers. That matters more than it sounds. You’re not competing for space at viewpoints, and the guide can tailor the pace to the group’s comfort.
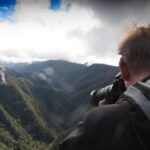
Transport is included and the vehicle is air-conditioned. The guide team is listed as driver/photographer, and the on-the-ground vibe matches that: people point out that the guide actively helps with photos, including for solo travelers. In a destination like this, where the best images depend on timing and positioning, that extra help is real value.
You’ll also notice the guides share practical local context, not just a list of place names. Past groups have highlighted how guides weave in history and stories while still keeping the route efficient.
Stop-by-stop: from Bald Hill’s hang-gliding views to Sea Cliff Bridge
Bald Hill Lookout & hang-gliding spot
This is the opening “wow” stop, with panoramic views along the Illawarra coast. It’s a quick 15 minutes, so treat it like a viewpoint sprint: step out, look around, take a few photos from different angles, then move on.
If you like photo timing, this early stop helps. You’re less likely to feel rushed, and your eyes are still fresh from the morning drive.
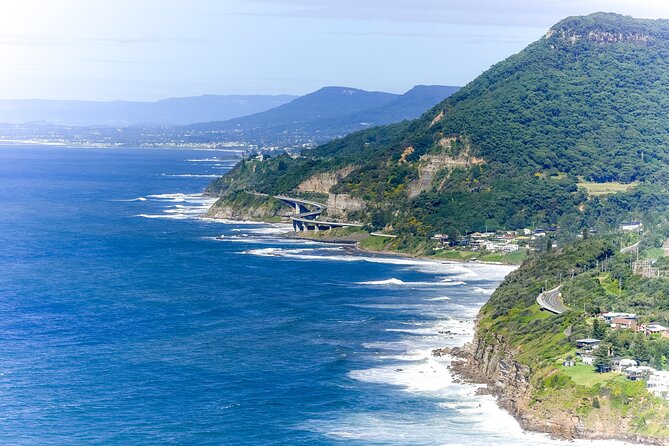
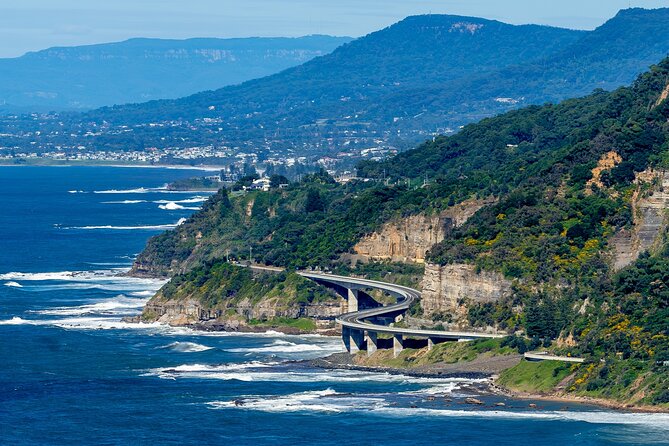
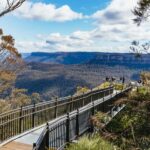
Sea Cliff Bridge (Wollongong) and the Grand Pacific Drive
Next comes Sea Cliff Bridge, a marquee stop on the famous Grand Pacific Drive stretch. You get about 30 minutes—long enough to get your bearings and capture the bridge with the coastline in the background.
What I like about this stop is its variety. It’s not just “look up at something.” The ocean and cliff lines set the scene, so even casual photos tend to come out dramatic.
And since the stop is built into a coastal route, you’ll feel the day’s overall rhythm—viewpoint, ocean, rock, repeat.
- Blue Mountains Small-Group Tour from Sydney with Scenic World,Sydney Zoo & Ferry
★ 5.0 · 3,709 reviews


Shellharbour beach time: walking without the rush
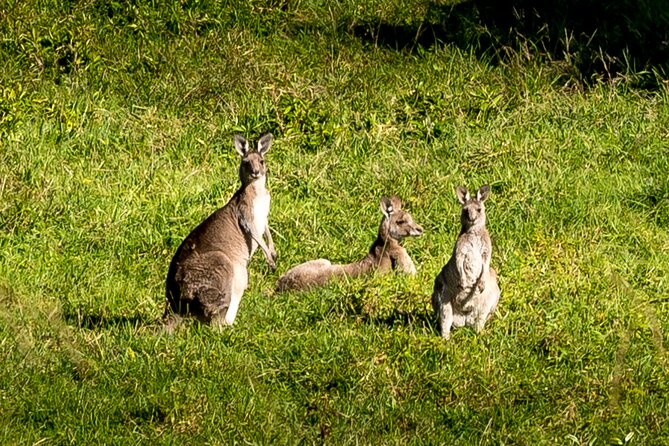
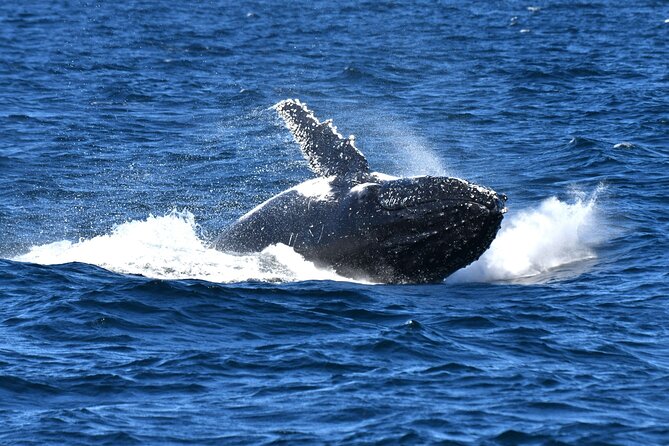
At Shellharbour, you get roughly 20 minutes. The focus here is simpler: a beach walk and a chance to watch surfers ride the waves. There’s also time to explore rock shelves near the shore, which can be a nice change from purely viewpoint stops.
This is also the kind of place where you might spot wildlife or small coastal details (birds, tide patterns, that ever-present Australian surf energy). The tour’s small group size helps because you’re not stuck in a crowd line—your group moves like a unit.
Tip for comfort: bring the right footwear. The tour recommends enclosed shoes (skip thongs/flip-flops).
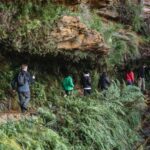
Minnamurra coastal walk: basalt cliffs and real walking time
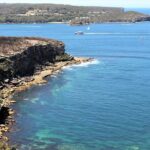
This is the biggest walking stretch on the standard route: Minnamurra with about 50 minutes for a coastal walk. You’re moving through a dramatic area of basalt cliffs, so the scenery is more “terrain” than “signboard.”
If you’re comfortable with moderate walking, this is the stop you’ll remember most. The views tend to look different as you move along the path, and the texture of the coastline is what makes the walk worth it—not just the destination point.
The main drawback? You’ll want steady footing. Coastal paths can be uneven, so give your shoes a test run before you travel.
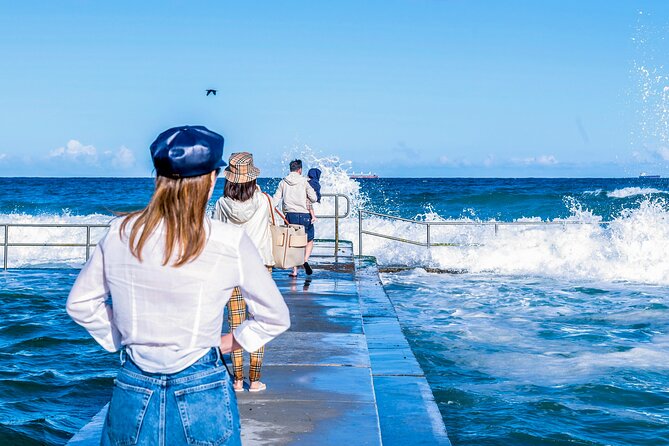
Kiama Blowhole: volcanic headland theater
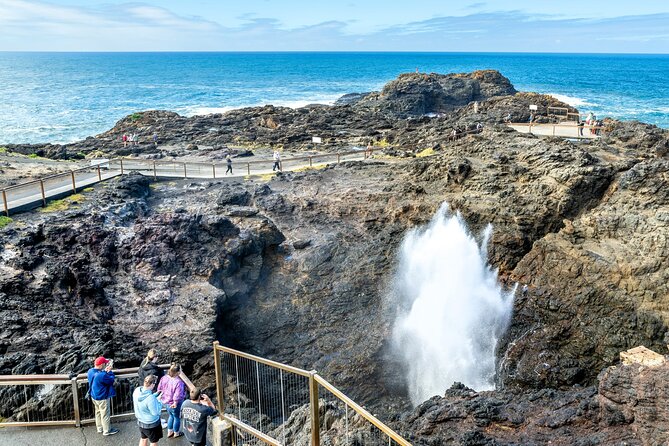
Now for the headline coastal moment: Kiama Blowhole. You’ll have around 30 minutes here, which is enough time to get positioned, watch the ocean action, and take photos without feeling stuck.
The description says it well: the Pacific Ocean meets a volcanic rock headland. What you’re really waiting for is the ocean’s timing. This is one of those places where conditions matter, so going with a patient mindset helps.
If it’s windy or the waves are active, this stop can feel energetic. If it’s calmer, you may still enjoy the rugged coastline and the dramatic rock formations even without big blowhole bursts.
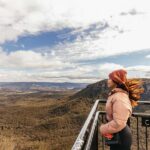
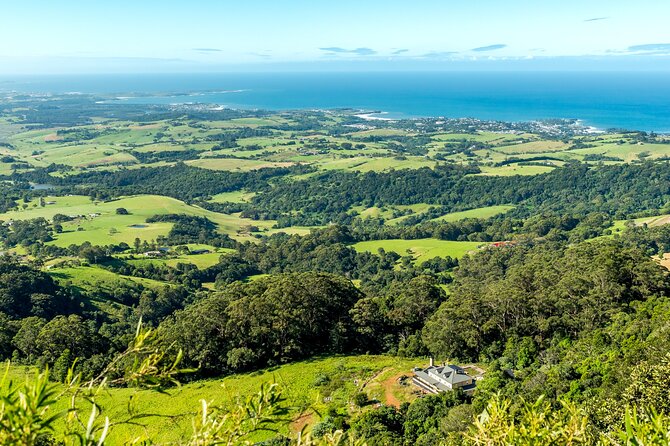
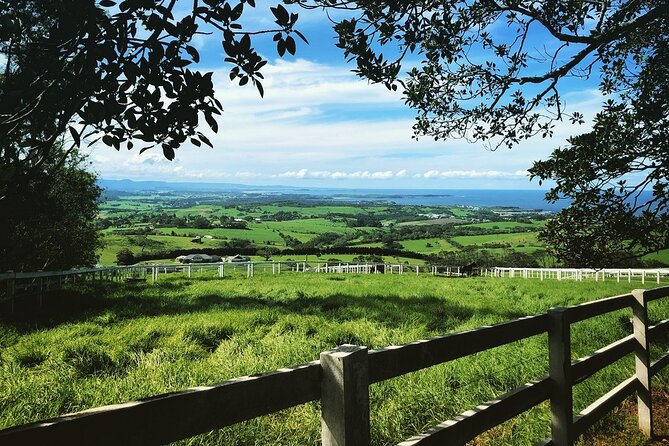
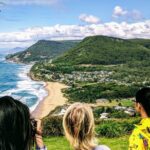
Saddleback Mountain Lookout: the 280-degree view factor
At Saddleback Mountain Lookout, you’re rising to about 600 metres above sea level for around 280-degree views. This stop is about 20 minutes, so it’s another quick hit, but with payoff.
This is a great contrast to the ocean stops. After rocky beaches and cliff edges, you get a wider sweep over land and coast—perfect for understanding where you are and how the Illawarra coastline spreads out.
If you’re the type who loves maps in your head, this is the moment it clicks. You can see why the coast has all those cut-ins, headlands, and sheltered stretches.
Jamberoo: quick countryside flavor before you head back
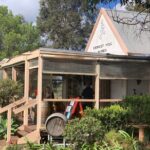
Finally, there’s a short break in Jamberoo, about 10 minutes. It’s described as a historic township with dairy farmlands and lush valleys.
This isn’t a long stop, so don’t expect a full town wander. Think of it as a palate cleanser after coast highlights—proof that the day isn’t only ocean scenery. It also helps the drive feel less repetitive: you get variety, not just another lookout.
Lunch, snacks, and what’s included for real value
Price is $202.26 per person, and the way the day is built makes that cost make more sense than it first appears. You get:
- Lunch
- Snacks
- Bottled water
- National park fees
- Air-conditioned vehicle
- Driver/photographer guide
So you’re not paying extra for park access across multiple stops, and you’re also not scrambling to find food in-between coastal viewpoints.
One practical note: tea, coffee, and soft drinks aren’t listed as included. Alcohol is available to purchase. If you’re a coffee person, plan to buy it at a stop or bring a non-alcoholic option before you start (if your operator allows it—check ahead when booking).
Vegetarian lunch is available if you advise at booking. That’s worth doing early so the kitchen isn’t guessing last minute.
Walking level: what moderate really means on this coast
This tour involves a moderate amount of walking. Most stops are short, but Minnamurra is the clear “step up” in leg work with its longer coastal walk.
What I suggest you do:
- Wear enclosed footwear (the tour specifically says no thongs or flip-flops)
- Bring a light layer. Coastal weather can swing quickly, even when the morning starts mild
- If you’re prone to sore knees, take it steady on uneven paths and let the guide know your pace
Also remember: viewpoints often involve quick transitions. You might step up to a lookout, then walk a shoreline section, then get back on the vehicle.
Best photo strategy for Sea Cliff Bridge, Blowhole, and Saddleback
This tour leans into photography. One recurring theme is that the guide helps people get good shots, including arranging photo moments for solo travelers.
Here’s the simplest way to get better photos on this kind of route:
- Use your time at each stop to shoot from multiple angles, even if you don’t change locations.
- At sea-level stops (Shellharbour and Kiama), expect wind and glare. Use your body position to block the wind while shooting.
- At Saddleback Mountain, quick steps matter. Give yourself a minute to adjust, then shoot in small batches rather than one big rush.
The guide’s photo focus can help with positioning and timing, so don’t be shy about asking where to stand. It’s built for that.
Price and logistics: what you’re really buying for $202.26
The headline is “$202.26 per person,” but the real value is that you’re paying for a full day of:
- transport from central Sydney
- a curated coastal route with several iconic stops
- national park fees handled for you
- lunch and snacks so you’re not hunting for meals
If you were to do this independently, you’d still pay for transport and you’d likely spend time figuring out entry fees and parking. This tour removes those friction points.
Two logistics details I’d note:
- The tour uses a mobile ticket.
- Pickup is timed by where you’re staying: 98 Harrington Street, The Rocks (30 minutes prior); Hyatt Regency (15 minutes prior); Rydges Sydney Central (5 minutes prior).
That level of coordination is a quiet win when you’re fitting a day trip around other plans.
Who should book this Kiama Coast day trip
You’ll probably love it if:
- You want big coastal scenery in a single day without car rental stress
- You like small-group days where the guide can talk with you
- You’re comfortable with short walks and one longer coastal walk at Minnamurra
- You care about photos and want help getting the group shots right
You might want to skip or choose a different format if:
- You hate long drives or a 10-hour day format
- You have limited mobility and can’t handle uneven coastal paths
- You want a slow, deep town experience instead of a route-based highlight day
Should you book this tour?
If your goal is to get out of Sydney and see the Kiama Coast highlights—Sea Cliff Bridge, Kiama Blowhole, basalt-cliff walks, and a high lookout view—this is a strong choice for the price. The small group size is the deciding factor for me: it keeps the day feeling personal, not crowded.
I’d book it if you’re traveling with limited time and you want your day to feel efficient and scenic. Bring good shoes, expect a moderate walking day, and plan to enjoy the ocean-driven mood of Kiama.
FAQ
How much does the Sea Cliff Bridge, Kiama Blowhole, Beaches & Wildlife tour cost?
The tour price is $202.26 per person.
How long is the tour?
It runs for about 10 hours (approx.).
What is the group size?
This is a small group tour with a maximum of 11 travelers.
What’s included in the tour price?
National park fees, bottled water, lunch, snacks, a driver/photographer guide, and an air-conditioned vehicle.
Is lunch vegetarian-friendly?
A vegetarian option is available. You need to advise the operator at the time of booking.
How much walking is involved and what should I wear?
There is a moderate amount of walking. Enclosed footware is recommended, and thongs or flip flops are not advised.
What are the age requirements?
Children must be accompanied by an adult, and the minimum age is 15 years.
Where is the meeting point in Sydney?
You meet at 98 Harrington Street, The Rocks (30 minutes prior), or at Hyatt Regency (15 minutes prior), or Rydges Sydney Central (5 minutes prior).
What happens if the weather is bad or I need to cancel?
The tour requires good weather. If it’s canceled due to poor weather, you’ll be offered a different date or a full refund. For cancellations, you can cancel up to 24 hours in advance for a full refund. Cancellation inside 24 hours does not receive a refund.
You Might Also Enjoy


More Wildlife Experiences in Sydney
More Tour Reviews in Sydney
- Blue Mountains Small-Group Tour from Sydney with Scenic World,Sydney Zoo & Ferry
★ 5.0 · 3,709 reviews