REVIEW · BLUE MOUNTAINS
E-bike (electric) – Blue Mountains – Hanging Rock – SELF-GUIDED Hire Service
Book on Viator →Operated by Blue Mountains Biking Adventures · Bookable on Viator
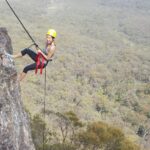
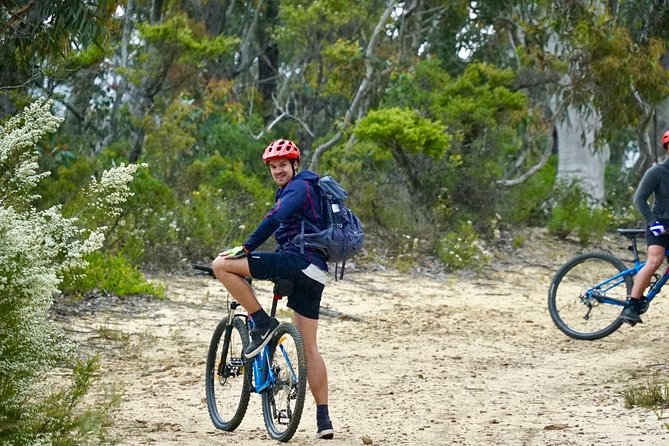
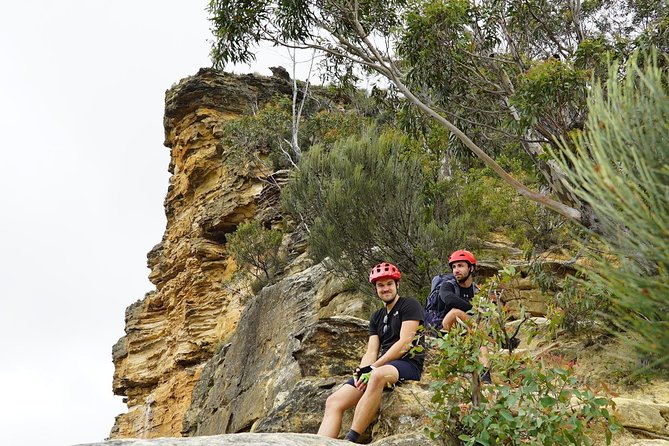
E-bike dirt roads with real cliffs. This Blue Mountains ride is interesting because you start with full safety gear and a proper bike run-through with Sam, then head out for an out-and-back ride to Baltzer Lookout and Hanging Rock. I like that the route is designed for smooth fire trails, so you’re not fighting the navigation while you’re busy enjoying the views. One thing to consider: you’ll want the right shoes, because Baltzer Lookout and Hanging Rock are loose underfoot.
What I really liked here is the mix of “self-guided” freedom and hands-on support. From hello to goodbye, you’re usually looking at 3–4 hours total, and riders generally finish the ride in about 3 hours. The bikes are e-bikes, and they’re selected to handle Blue Mountains fire trails without making the whole day feel like a workout.
There’s also an honest safety note built into the experience: Hanging Rock doesn’t have a fence, so you’ll need to stay aware around edges. If you do that, it’s a spectacular ride format—easy to manage, scenic, and very practical for a morning in the mountains.
In This Review
- Key points before you pedal off
- E-biking the Blue Mountains: why this format works
- Meet Sam in Blackheath and get your e-bike dialed in
- The trail you’ll ride: ridgeline fire trails to Baltzer Lookout
- Hanging Rock: jaw-dropping views without a safety fence
- What’s included (and what you may need to add)
- Timing, pacing, and what “3–4 hours” really means
- After the ride: Blackheath cafes and the Grand Canyon walk
- Price and value: what $131.97 buys you
- Who this ride is best for (and when to skip it)
- Should you book this e-bike hire on the Blue Mountains?
- FAQ
- How long is the Blue Mountains e-bike hire ride?
- Where does the ride start and end?
- Is this truly self-guided?
- Do I need my own pedals?
- What insurance is included, and what is it limited to?
- What shoes should I wear?
Key points before you pedal off
- Sam’s setup takes 30–40 minutes, so you learn the bike and trail basics before you ride
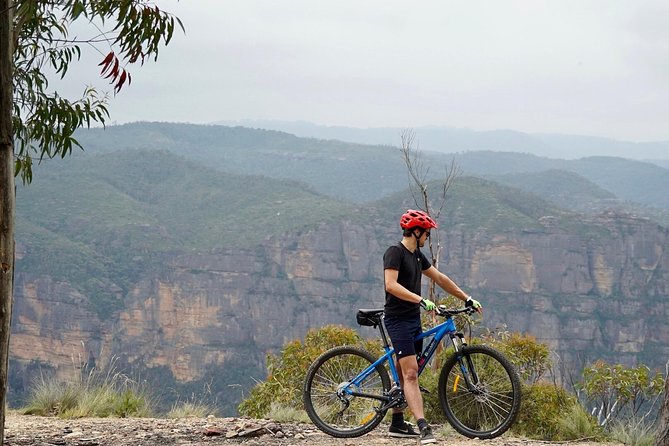
- Merida Big 7/9 e-bikes with Shimano motor and battery, built for fire trails
- Out-and-back ridgeline route to Baltzer Lookout and Hanging Rock with easy navigation
- Loose underfoot at the viewpoints means grip-first shoes, not fashion-first sneakers
- Small group size (max 15) and a mobile service that runs when weather is good
E-biking the Blue Mountains: why this format works
This isn’t a full-day guided expedition with constant talking. It’s closer to a smart “hybrid” day: you get real coaching at the start, a map for the ride, and then you control your pace through the forest.
The Blue Mountains setting is UNESCO-listed wilderness, and the route is built around fire trails along the ridgeline. That matters because it changes what the day feels like. Instead of white-knuckle technical riding, you get flowing trail sections with only a few short climbs. You still earn your lookouts, but the e-bike helps you keep your energy for the scenery and the photo stops.
The ride is typically scheduled around half a day on the trail. Even though the operator describes it as self-guided, you aren’t dropped off cold. Sam meets you at the confirmed time, fits you up, and gives you trail info plus technical tips that help you ride better and feel safer—especially if you’re newer to dirt.
You can also read our reviews of more cycling tours in Blue Mountains
Meet Sam in Blackheath and get your e-bike dialed in
Your day starts at Blackheath NSW 2785, with a 9:00 am start time. The activity ends back at the meeting point, so you don’t have to figure out transport gaps after the ride. The service is mobile, and they confirm timing the night before with a phone call from Sam.
When you arrive, expect paperwork and then bike fitting. You’ll spend about 30–40 minutes with Sam covering:
- how to operate the wide-handle 29er e-bike
- what to do on the trail (and what to watch for)
- skills and technical tips (the kind that make you feel more confident quickly)
- helmet fitting for a secure, correct fit
This matters more than people think. A good helmet fit and correct basic bike handling can be the difference between a comfortable day and a day spent second-guessing every turn. Sam also takes safety seriously, and the whole setup is designed to get you rolling smoothly.
One useful booking detail: include each rider’s height and gender when booking. That’s for correct bike size allocation, and it’s exactly the sort of practical step that prevents the common problem of mismatched bikes.
Also plan for ID. You’ll need a passport, licence, or acceptable identification plus an active credit card on the day for security purposes. It’s one of those small steps that helps the whole system run smoothly.
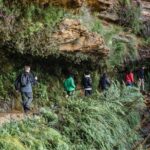
The trail you’ll ride: ridgeline fire trails to Baltzer Lookout

Once you’re set, you get a map in hand and you’re off. The ride follows flowing trails along the ridgeline. Think forest, open mountain air when the trail lifts, and a route that’s designed to be easy to follow.
This is an “out and back” ride. That’s great for pacing because you can judge how you’re feeling partway through, then simply reverse the route on the way back. It’s also good for less-experienced cyclists who want dirt time without a complicated navigation puzzle.
Expect the profile to be manageable:
- flowing sections that feel smooth on an e-bike
- a few short climbs
- a route that generally rewards steady effort rather than sprinting
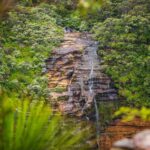
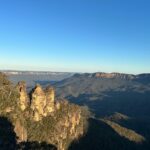
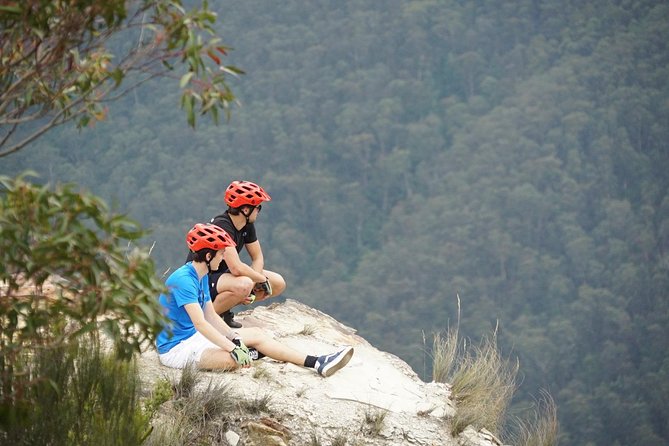
And yes, the views are the main event. Baltzer Lookout is where you get that classic Blue Mountains feeling—big drop-offs, wide sightlines, and that sense that you’re far from everyday life.
The navigation is intentionally simple, so you’re more likely to enjoy the ride rather than constantly checking your phone. That’s a big deal in the mountains where reception can get spotty and your focus should stay on riding.
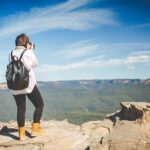
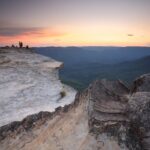
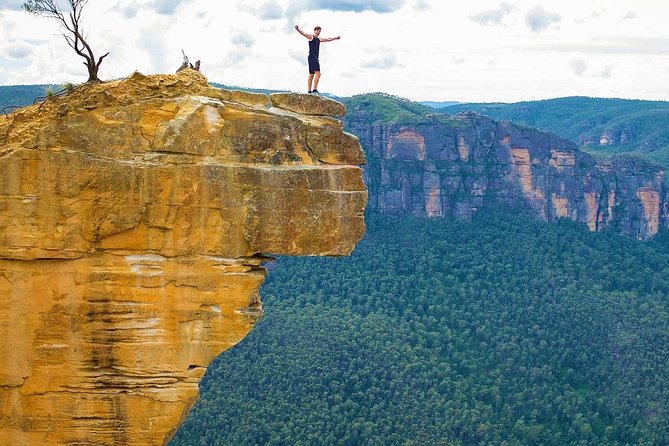
Hanging Rock: jaw-dropping views without a safety fence
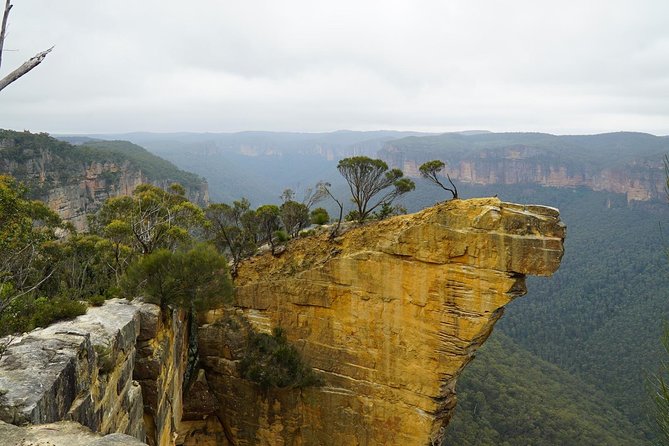
The second major highlight is Hanging Rock. Unlike other lookouts, there’s no safety fence separating you from what can feel like the bottom of the world. That detail changes how you should approach the stop.
In practice, it means:
- slow down near edges
- keep a little extra spacing from drop-offs
- don’t rush for the perfect photo
- keep your attention on footing, because the surface can be loose underfoot
This is exactly why they emphasize shoes. Even with an e-bike doing the heavy lifting, you’ll still be walking on uneven, grippy-or-not terrain. If you’ve got shoes with real traction, you’ll enjoy this more. If not, you might end up doing the careful shuffle instead of soaking it in.
The good news: the trail itself is designed to be rideable for a range of experience levels. The tricky part is not the pedaling—it’s the viewpoint moment. Treat that as the one segment where you ride like you’re on a balcony, not like you’re on a paved lookout.
What’s included (and what you may need to add)
The hire kit is straightforward and built for quick readiness.
Included:
- the bike (Merida Big 7/9 e-bike)
- glove hire
- spare tube/pump/tyre lever hire
- accidental bike damage insurance (with an important limitation)
That insurance note is worth reading closely. The accidental damage insurance included does not cover any electrical components. E-bikes are designed to make riding easier, but the electrical system is still part of the machine. If you’re the type who likes a little extra peace of mind, there’s an option to purchase bike insurance on the day for $30. Just understand that the electrical-components limitation is a specific detail you’ll want to factor in.
Not included:
- SPD pedals, with the option to hire on the day for $15
If you ride with clip-in pedals often, you might want to bring your own shoes for SPD use if you have them. If not, consider that hiring SPD pedals still adds one more step. On dirt days, simple and secure is often better than complicated.
Also, you’ll want to think about footwear before you arrive. Loose surfaces near Baltzer Lookout and Hanging Rock mean shoes need grip. This is not the day for smooth-soled sneakers.
One more practical detail: the ride starts on fire trails and finishes back at the meeting point. You’re not doing a one-way trek with bike return hassles.
You can also read our reviews of more guided tours in Blue Mountains

Timing, pacing, and what “3–4 hours” really means
The operator says from hello to goodbye you should plan 3–4 hours. Riders generally complete the ride in about 3 hours, which lines up with:
- check-in and paperwork
- 30–40 minutes of bike fitting and instruction
- actual ride time out to the lookouts and back
- a little time for the viewpoints
Start time is 9:00 am. This makes the plan feel easy for a holiday day. You get enough morning energy before midday, and then you can still do other things in Blackheath after.
And if timing changes, it can. Start and finish times can vary to accommodate customers, and Sam confirms details the night before with a phone call.
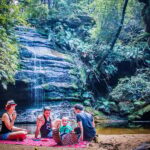
After the ride: Blackheath cafes and the Grand Canyon walk
Once you’re back in Blackheath, you’ve got options. The area has cafés in the village, which is a practical choice if you want food and a chance to compare notes with your own group.
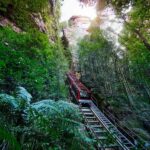
If you want a hike afterward, there’s a well-known route from Blackheath called the Grand Canyon walk. It’s typically described as a 2–3 hour hike with scenic valley views across the Grose Valley and crisp mountain air. It’s a natural pairing: bike time for the big viewpoints, then feet for a slower, detailed perspective.
That combo can be a great way to make one day feel full without tiring yourself out into misery.
Price and value: what $131.97 buys you

The price is $131.97 per person, and the service is often booked about 46 days in advance. That booking lead-time matters because limited availability usually means you’ll have a better chance to get your preferred day if you plan ahead.
What you’re paying for isn’t just a bike rental. You’re paying for:
- an e-bike set up to handle the fire trails
- a real safety and bike operation lesson with Sam
- helmet fitting
- gloves and basic emergency trail gear (tube/pump/lever hire)
- insurance coverage for accidental bike damage, with a clearly stated limitation
Compared with a barebones self-ride rental, the included instruction can save you stress. Compared with a fully guided tour, it’s usually lighter on schedule and lets you ride at your own pace while still having expert starting support.
If you want dirt time in a UNESCO-listed wilderness but you don’t want complicated route planning, this hits a sweet spot. It’s also a smart way to ride if you’re not sure how you’ll handle hills—because the e-bike helps you match your effort to the views.
Who this ride is best for (and when to skip it)
This ride is designed to work for experienced cyclists and less-experienced riders too. The reason is the trail style: flowing fire trails with only a few short climbs, plus easy navigation.
You’ll likely enjoy it if:
- you want an out-and-back dirt ride with big viewpoints
- you’d rather follow a map than manage complex navigation
- you appreciate a safety-first start that includes helmet fitting and bike operation tips
- you’re comfortable riding a bike with e-assist (not just walking it)
You might want to reconsider if:
- you don’t have grip footwear and you’re not willing to walk carefully at the viewpoints
- you’re uncomfortable around edges, since Hanging Rock has no safety fence
- you show up without a moderate physical fitness baseline, since you still need to pedal and handle short climbs
The service also runs with good weather only. If weather is poor, you’ll be offered a different date or a full refund. That’s the right approach for a dirt-and-views day.
Should you book this e-bike hire on the Blue Mountains?
I’d book it if you want a half-day plan that feels both guided and flexible. The best part is the start: Sam’s setup and the 30–40 minutes of help mean you don’t waste your ride time guessing. Then the trail does its job—flowing fire trails to Baltzer Lookout and Hanging Rock.
The decision hinges on two practical things: footwear with real grip and your comfort level with an unfenced viewpoint. If you’re good with those, you get a very memorable Blue Mountains experience without turning the day into a technical riding challenge.
If you’re on the fence, ask about helmet fit and bike size details when you book, and make sure you’re ready with the ID and credit-card requirement so you can start without delays.
FAQ
How long is the Blue Mountains e-bike hire ride?
You should plan about 3–4 hours total from hello to goodbye. Riders generally finish the ride in about 3 hours, starting at 9:00 am.
Where does the ride start and end?
The ride starts in Blackheath NSW 2785 and ends back at the same meeting point.
Is this truly self-guided?
It’s self-guided after the setup. You’ll meet Sam, get fitted with safety gear and a bike introduction for about 30–40 minutes, then you’ll ride using a map and the trail info provided.
Do I need my own pedals?
SPD pedals are not included. You can hire SPD pedals on the day for $15.
What insurance is included, and what is it limited to?
Accidental bike damage insurance is included, but it does not cover electrical components. There is also an option to purchase bike insurance on the day for $30.
What shoes should I wear?
Shoes matter a lot here. Baltzer Lookout and Hanging Rock have loose underfoot, so you need shoes with grip.